
For scaling UK jewelry brands, the primary obstacle to growth isn’t design, but manufacturing consistency. While unique aesthetics capture the market, flawless replication is what retains it.
As orders double, relying on initial prototyping methods—like individual wax carving—inevitably fails, causing quality to slip and unit costs to rise.
The bridge to profitability lies in professional tooling. Understanding how to make molds for jewelry casting with scalable processes is essential for achieving stable quality and predictable output. By transitioning to modern mold-making techniques, brands ensure their thousandth casting is as precise as the first, securing the efficiency needed to thrive in the competitive UK market.
Understanding Jewellery Moulds: The Blueprint for Scale
At its core, a jewellery mould is the negative impression of a “master model” used to reproduce that design repeatedly with high fidelity. It acts as the bridge between a singular design concept and mass production. For growing brands, the mould is the asset that ensures the 500th ring looks exactly as perfect as the first.
To optimise your production, it is vital to distinguish between the two primary approaches used today: wax mould casting jewellery methods and modern resin workflows. Traditional wax moulding involves injecting liquid wax into a rubber mould to create replicas. However, modern manufacturing increasingly relies on moulds for resin casting jewellery workflows, where high-fidelity 3D printed resin masters are used to create the initial production moulds. While wax is forgiving and traditional, resin allows for the hyper-detail required by contemporary geometric and filigree designs, though it demands stricter burnout cycles to prevent ash residue.
Step-by-Step Guide: How to Make Molds for Jewelry Casting
Transitioning from a studio prototype to a factory-ready mould requires a disciplined technical process. Here is the industrial standard workflow for creating high-precision moulds.
Step 1: Design Preparation
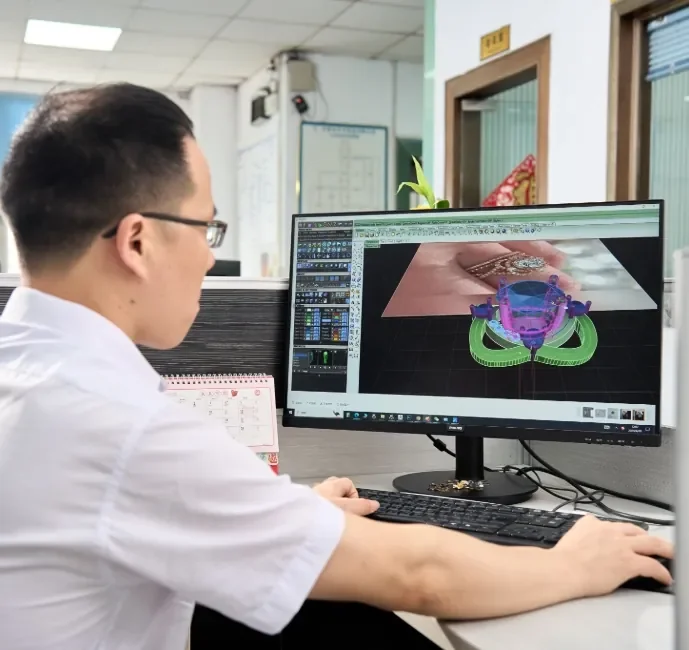
The process begins with digital precision. While hand-sculpted prototypes have their place, scaling brands primarily use CAD (Computer-Aided Design) software. This ensures that every dimension is exact, shrinkage rates are calculated in advance (typically 1.5%–2.5% for rubber moulds), and sprue channels are optimised for metal flow. For the UK market, where consumers demand perfection, digital files minimise the risk of structural errors before a physical model even exists.
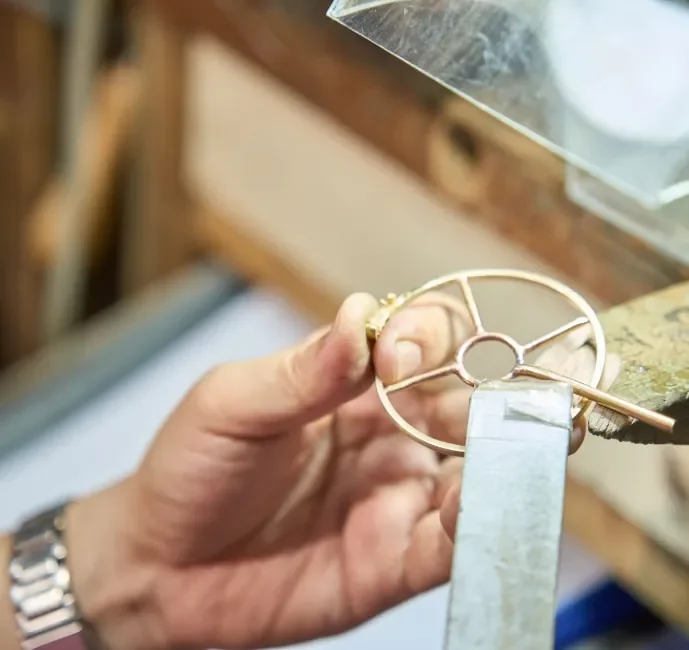
Step 2: Master Model Creation
Once the design is finalised, a “Master Model” is created, often done using wax or resin. This initial prototype serves as the foundation for the manufacturing process. For large-scale production, this model is typically converted into a robust silver or alloy master to ensure stability and precision during mould vulcanization. This master must be flawlessly polished; any imperfection on the master will be duplicated in every subsequent casting.
Step 3: Mould Material Selection
Choosing the right mould material is critical for the geometry of the piece.
- Vulcanised Rubber: The industry standard for high-volume production. It is durable and cost-effective, but requires heating the master model under pressure. It is ideal for sturdy designs but can damage delicate masters.
- Liquid Silicone (RTV): “Room Temperature Vulcanising” silicone is poured over the master rather than pressed. It causes zero shrinkage and is perfect for delicate, organic, or complex shapes where heat might warp the master.
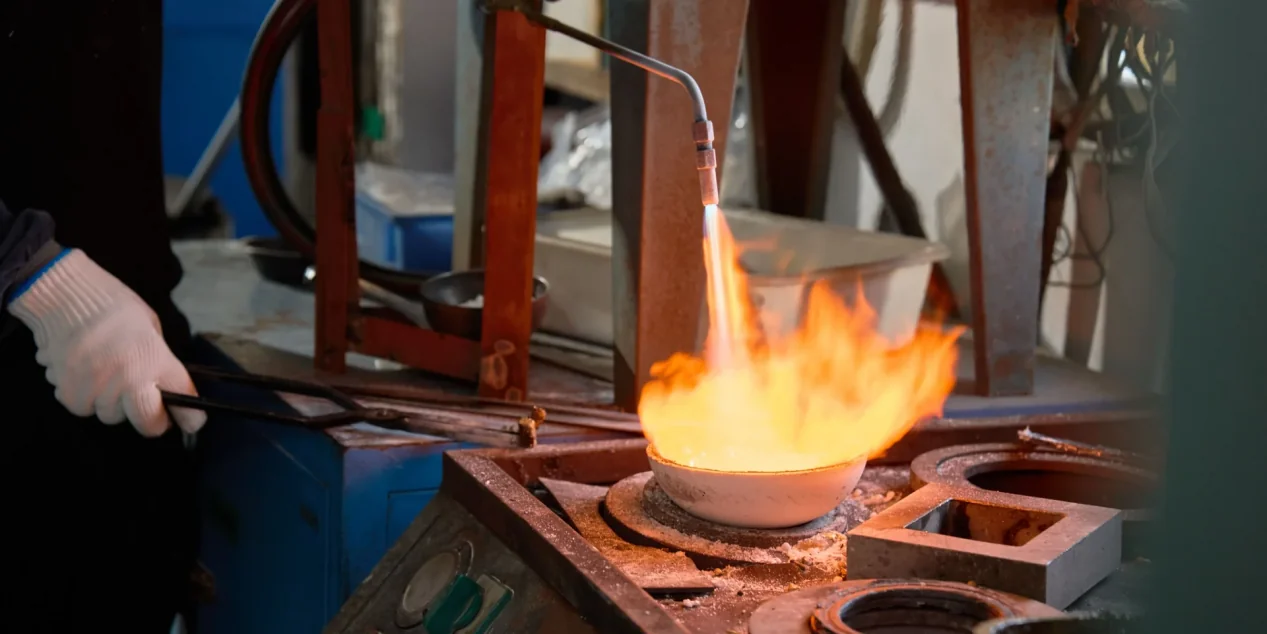
Step 4: Mould Making Process
This stage demands precision. The master model is suspended in a mould frame. For silicone moulds, the liquid material is poured around the master and vacuum-degassed to remove air bubbles that could form defects. For vulcanised moulds, sheets of raw rubber are packed around the master and cooked in a vulcaniser press. Once cured, the mould is carefully cut open (“scalped”) by a skilled technician using a zigzag cut. This specific cutting technique ensures the mould keys lock back together perfectly, preventing “flashing” (excess metal) on the final waxes.
Step 5: Testing and Adjustment
A mould is never assumed to be perfect immediately. The first few wax injections are critically examined. Technicians check for air bubbles, incomplete fills, or distortion. If the wax doesn’t flow smoothly to the finest details, additional air vents are cut into the mould to allow trapped gas to escape. Only after these adjustments have produced a flawless wax replica is the mould approved for mass production.
The Role of Jewellery Moulds in Brand Growth
Efficient mould-making is not just a manufacturing step; it is a strategic asset for your business.
1. Ensuring Design Consistency
In the jewellery sector, consistency is trust. A precise mould ensures that a necklace bought in London matches one bought in Manchester. It eliminates the “hand-made” variances that, while charming in a hobbyist setting, are unacceptable for a scaling brand’s quality control standards.
2. Enabling Mass Production
Moulds unlock the ability to scale. A single high-quality mould can produce thousands of wax replicas, allowing you to move from producing 50 pieces a month to 5,000 without a linear increase in labour costs. This scalability is the only way to meet the inventory demands of large retailers or peak holiday seasons.
3. Shortening Time-to-Market
With modern rapid prototyping and mould-making, new collections can go from CAD to cast samples in days, not months. This agility allows brands to react to micro-trends—like a sudden demand for chunky silver rings—faster than competitors relying on slower, traditional supply chains.
4. Supporting Customization
Advanced mould libraries allow for “mass customisation.” By having base moulds for popular shanks or settings, brands can quickly modify core designs to offer semi-custom pieces, satisfying the growing consumer desire for personalisation without the cost of bespoke manufacturing.
Conclusion
For jewellery brands growing in the competitive UK market, the path to profitability lies in professionalising your backend operations. You need a partner who understands that how to make moulds for jewellery casting is about more than just rubber and wax—it is about precision, repeatability, and speed.
To truly scale, you need a manufacturing partner with established industrial capabilities and deep process insights. Star Harvest empowers brands to achieve this performance growth. With nearly 20 years of experience, we offer a comprehensive OEM solution, covering everything from 3D CAD design and rapid 7-day prototyping to precision mould making and ISO-certified mass production. By leveraging our expertise in wax mould casting jewellery and advanced manufacturing, you can focus on building your brand while we ensure every piece meets the highest standards of quality and consistency.